Building description

In this description you can learn step-by-step how to make your own Roquetinho. All you need is some basic do-it-yourself skills, and for the metal work (someone with) welding skills. Material costs will be
around 400 euro.
Roquetinho outline
Roquetinho is…
The visible part of the stove (the casing or bell) is made of concrete tiles, such as those often sold for garden paving (60 x 40 x 5 cm). The top is a 6mm thick steel plate.
The bell absorbs the heat produced and gradually releases it into the room.
On the inside you'll find the rocket burner (the core) in which the combustion takes place. The core consists of a firebox made of hard refractory bricks, and a riser: a vertical channel made of refractory insulating bricks. In this riser, two whirlpools of fire (double vortex) are created, in which the wood gases are afterburned at very high temperatures.
Archive
In the archive you can find older versions of the Roquetinho. You will also find a page on working with fire concrete, as was done in previous versions.
And here’s the SketchUp files for the 2025 model, the one this description is about. The folder contains the file of the stove, as well as seperate 3D files for the core, the secondary air duct and the frame & door unit.
Step 1 Preliminary considerations, tools, materials
Before getting started with the stove it’s important to check a few things: the supporting floor needs to be strong enough for the 530 kg stove, the chimney should be okay, and volume and insulation of the space to be heated should be in such a way the Roquetinho can do the job. Read more...
Step 2 Casting and cutting concrete. Base layer, bottom slab.
It's practical to use plastic coated chipboards as a bottom for the moulds, since they are already waterproof and don't need to be painted. Saw the laths that form the mould and fix them on the bottom with screws (not with glue). Paint the laths (2 layers). When the paint has dried, fill the inside brims with a bit of acrylic sealant.
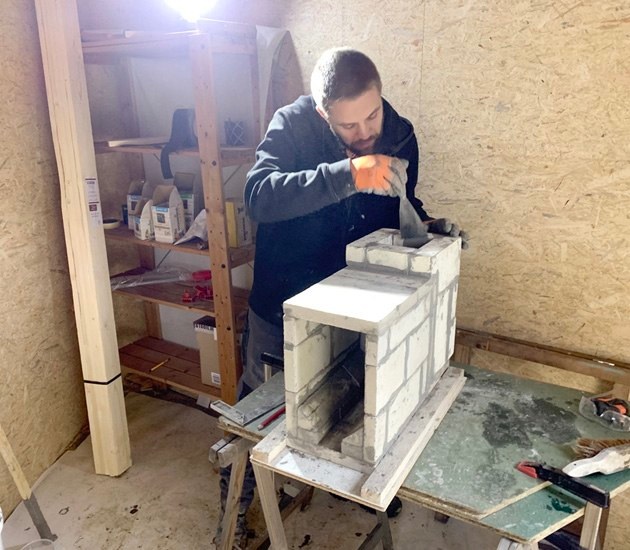
Step 3 Firebox and riser
It's best to build the firebox on a sturdy work table. First, make a transport board from a piece of 18 mm plywood or other sturdy plate with which you can transport the core. Read more...
Step 4 First layer of the bell. Placing the core
The top of the firebox should be exactly the same height as the top of the first layer of the bell. In the SketchUp drawing, that first layer is 400 mm. The firebox is 348 mm with a 50 mm tile underneath and a a layer of 2 mm ceramic felt. Read more…
Step 5 Construction of the bell
From the second layer, the corners are secured with a screw. For this, holes with a diameter of 6 mm are drilled on the longer parts, 25 mm from the side. Read more…
Step 6 Metalwork: floorchannel, frame and door unit, top plate
The dimensions of the floorchannel and the frame and door unit assume a core with outside dimensions of 220 x 348 x 570 mm. If these dimensions differ you need to adapt the figures. Read more...
Step 7 Assembly
You fix the frame with cob. Working with cob is really different from working with cement. Try it out first; the cob shouldn't be too dry or too wet. When applying, ensure you make an uninterrupted "roll"; there should be no gaps in it. Read more…

© 2018 roquetinho.eu


© 2025 roquetinho.eu. This building description is available under
the Creative Commons Attribution-ShareAlike 4.0 International license.