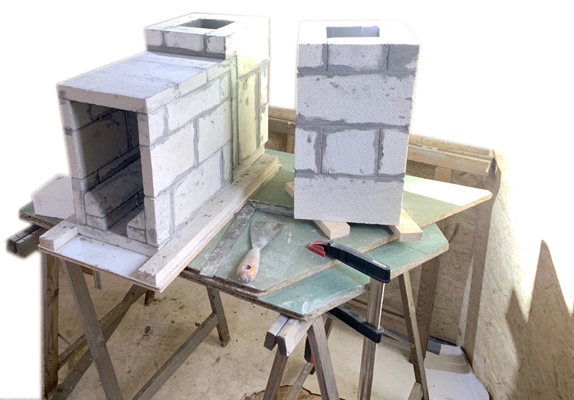
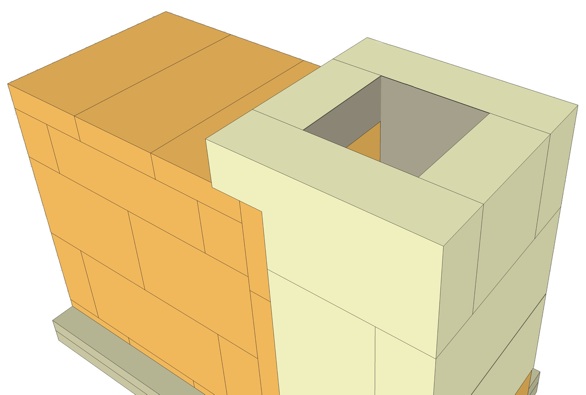
Step 3 Firebox and riser
The firebox
It's best to build the firebox on a sturdy work table. First, make a transport board from a piece of 18 mm plywood or other sturdy plate with which you can transport the core. Fix a batten on both sides, in such a way the bottom bricks just fit in between.
About gluing with Moviset
You are going to glue the core together with Moviset or a similar refractory glue. Open the Moviset bucket and pour off the covering liquid. Stirr well until it has the same consistency throughout. Add a little of the poured-off liquid if necessary. When you're done gluing, cover the remaining glue with a layer of water before putting the lid on.
The parts to be glued should be thinly but completely smeared on both sides, about half a millimeter thick. At 15º Celsius, the glue has hardened after about 24 hours. It takes much longer at lower temperatures.
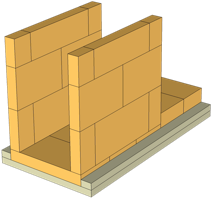
Bottom bricks
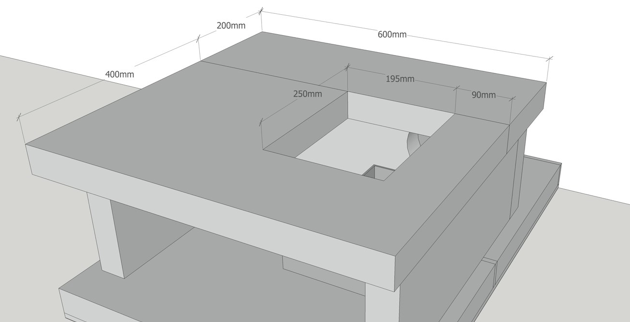
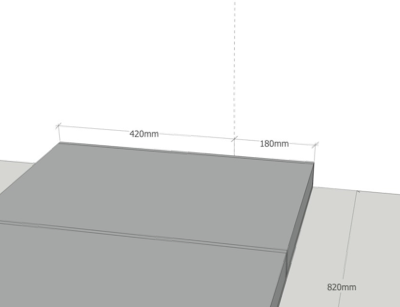
This building description assumes firebricks with measurements 220 x 110 x 30 mm and 220 x 110 x 60 mm.
The front three bricks have a height of 30 mm, the rear two are 60 mm high.
Measure the length of the five bricks including the 1 mm space for the glue, and shorten the fifth brick to obtain a total bottom length of 537 mm.
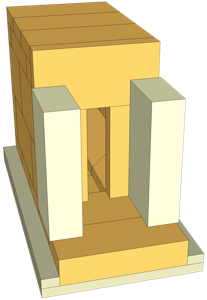
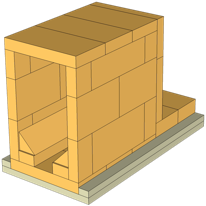
1. Transport board with bottom bricks
2. Walls
3. Top bricks, port, 45º bricks
Gluing the firebox
Butter the bottom bricks with glue and place them on the transport board. Using a large clamp, carefully apply pressure across the bricks until the glue begins to squeeze out. Make sure the bricks are level. Let it dry.
Now cut bricks for the walls of the firebox, in such a way they fit on the three bottom bricks (332 mm). You adjust the top layer in such a way that the total height of bottom bricks, walls and top bricks is
348 mm.
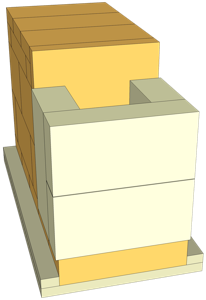
Next is adding the port bricks.
If the bricks are exactly 220 x 110 mm, the vertical port bricks will be 183 x 90 mm, as drawn in the SketchUp file. But if the bricks are slightly larger or smaller, those sizes must be adjusted. The most important thing is that the port opening will be 183 x 42 mm.
The vertical port bricks are glued to the 4th bottom brick, as well as to the walls. On top of them you glue the horizontal port brick. Make sure everything is flat, square and level.
Next glue the top bricks in place, see the picture. On the inside of the firebox, glue on 30 x 48 mm cut bricks. They form the 62 x 30 mm slot that accepts the secundary air duct. The 45º chamfered bricks are glued on top of them. Fill any gaps with glue.
At the front, 4 mm of space is kept open for the metal plate that sits at the front of the floorchannel.
4 mm space
The riser: cutting and gluing insulation bricks
48
48
34
34
The insulation bricks are 64 mm wide, which should be reduced to 57 mm. You can easily saw them with a handsaw with hardened points, but sawing a narrow slice is difficult. Then a saw guide offers a solution. Make it out of timber, see the drawing.
If all goes well, the tops are flush.
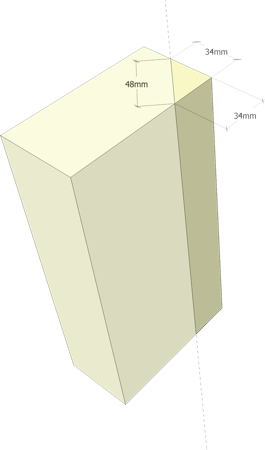
Take a brick and draw a line 34 mm on either side of a corner. Draw the diagonal line at the short end and saw the brick lengthwise (see drawing). Do this at another corner as well.
You now have two triangular strips that will be glued to the inside of the riser (see drawing).
At the inside of the insulation bricks comes a thin layer of Moviset. Dilute the glue until it is almost liquid and apply it with a brush.
The third layer
Of the third layer, the two whole bricks have a notch. It will be approximately 57 x 59 mm, but measure the exact size in the work, taking into account the 1 mm Moviset. A brick cut exactly in the middle completes the layer. The inside of the front half-brick is flush with the port.
Also brush this layer on the inside with Moviset.
The upper part
You can already glue the upper part of the riser together. Brush the inside of each layer again with Moviset. Only later in the building process the upper part is put on top of the bottom part.
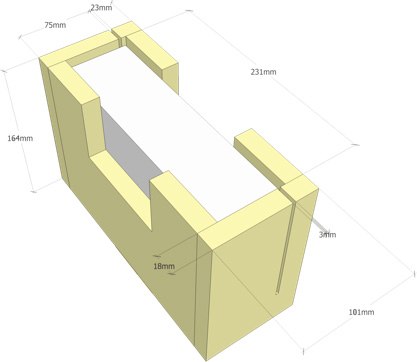
231
23
75
164
101
3
18
Coat the inside with Moviset


183
42
537
348
220
332
Download here the 3D SketchUp file