Step 2 Casting and cutting concrete. Base layer, bottom slab
Casting concrete
Making the moulds
It's practical to use plastic coated chipboards as a bottom for the moulds, as they are already waterproof and don't need to be painted. Saw the laths that form the mould and fix them to the bottom with screws (not with glue). Paint the laths (2 layers). When the paint has dried, fill the inside brims with a bit of acrylic sealant.
If you use the mould again, first clean it well and fill the brims again.
Casts
There are five moulds to be cast: two blocks and two plates for the base layer, and the exhaust piece: the block with the opening for the flue pipe. Mixing ratio for the blocks and the exhaust piece is 1 portland cement : 2 sand : 3 fine gravel.
Rear plate and
hatch 550x200x24 mm
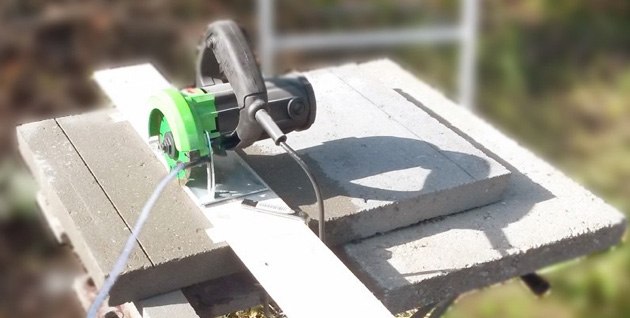
Saw concrete
Cutting the blocks and tiles to size can be done with an angle grinder, but it’s much better and more precise with a water-cooled diamond circular saw.
The blocks for the bell are 60 x 20 x 5 cm (a tile in half lengthwise) and 50 x 20 x 5 cm. For the latter, first saw off 5 cm from the short sides (see picture), and then cut the tile in half lengthwise.
Mixing ratio for the two plates is 1 portland cement : 2 sand - no gravel. The hatch is only 24 mm thick, so wait at least 5 days before demoulding. The rear plate is glued to the two side blocks. The front plate is used as a hatch.
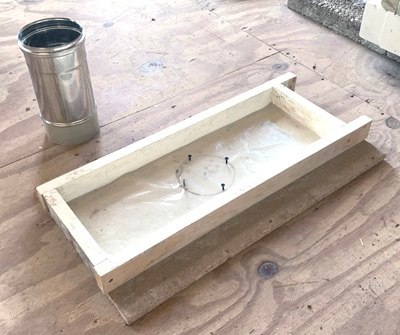
To be sure the flue pipe will comfortably fit in, the exhaust piece has a cut-out of 123 mm: 3 mm larger than the flue pipe.
You can use the flue pipe as a fit for the opening. Cut a strip of thick plastic and wrap it around the end a few times. To hold the tube in place you tighten 4 screws into the mould. See the pictures.
Mark clearly and use a guide bar. With a 125 mm diamond blade you saw through a concrete tile in six passes: approximately 9 mm depth per pass.
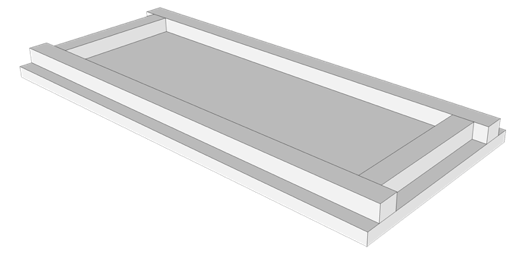
Bottom slab
The bottom of the stove consists of four pieces; see the dimensions on the drawing. Saw them to size and glue them together. Only when the glue has hardened properly, place the whole thing on the base layer. It then rests on the Superwool, on the front square tube and on the two spacers at the back.
Fill the two joints underneath the bottom slab with cement. You seal the seam with the exhaust block with sealant.
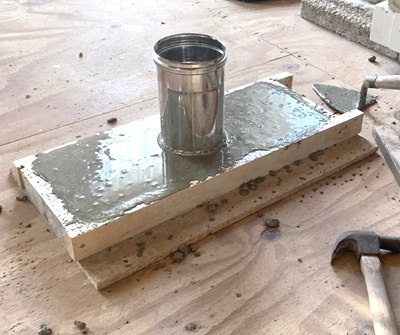
Before casting, grease the mould well with oil to prevent the cured casting from sticking to the mould.
After pouring in the concrete, vibrate it by tapping the mould with a hammer for a few minutes. While curing, cover the mould with a piece of plastic. Even after demoulding, keep the castings in plastic to prevent evaporation. Concrete hardens through the reaction with water, and that's only completed after 28 days.
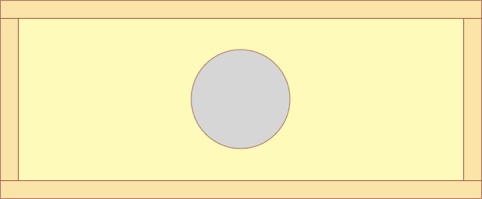
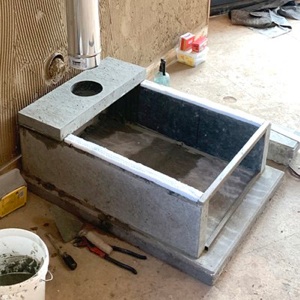
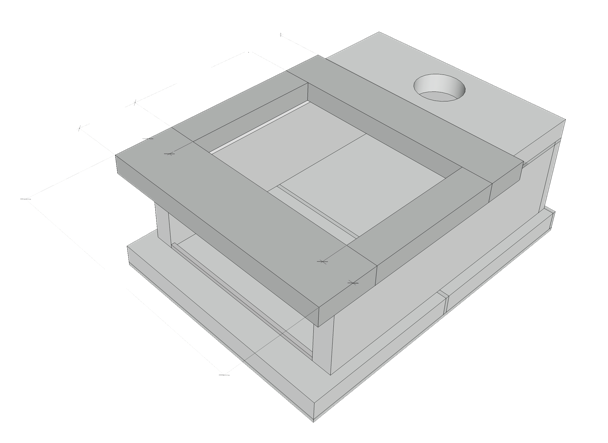
Exhaust block
550x200x50 mm with a Ø 123 mm opening for the flue pipe
123

Side blocks
715x200x50 mm
Exhaust block 550x200x50 mm
Fluepipe used as a fit
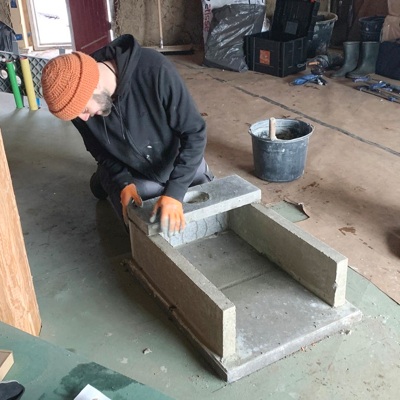
Gluing the rear plate onto the side blocks
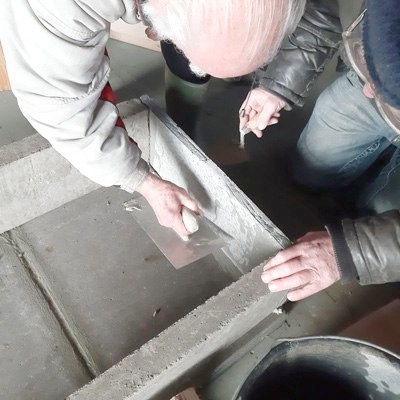
Fixing the exhaust block


300
300
850

Location of the stove
From the opening in the ceiling through which the flue goes, draw a plumb line to the floor.
At 30 cm to the left and 30 cm to the right of that point, draw a line. The first two 40 x 60 cm concrete tiles will be placed between these two lines. You fix them on the floor with cement; the ratio cement / sand is 1 : 5.
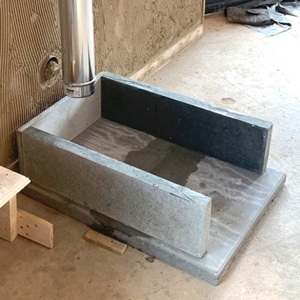
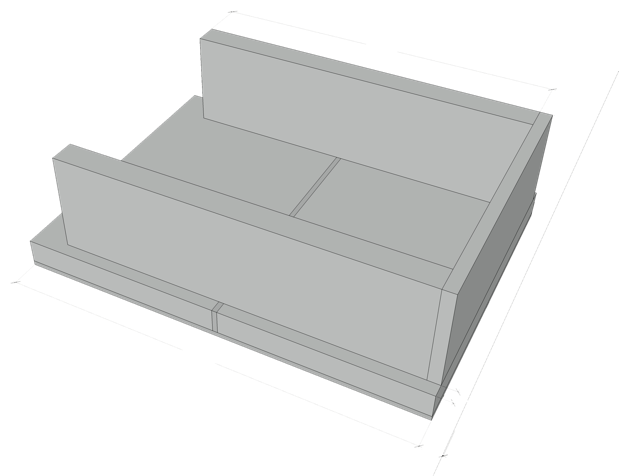
Base layer
At 40 mm from the wall, you glue the rear plate and the two 715 x 200 mm side blocks onto the two tiles and onto each other. A space of 25 mm is left on both sides. Use a carpenter's square and make sure it's level. Press the parts firmly together with glue clamps. If necessary, correct with a clamp.
With a joint of 9 mm, you now brick the exhaust piece onto the back of the base layer.
715
810

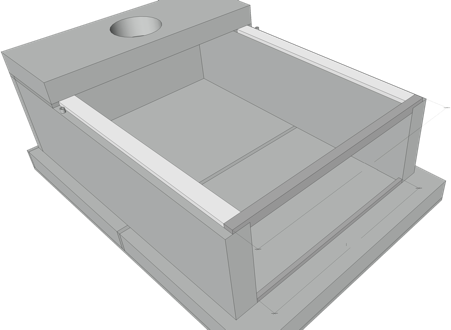
At the front, a square tube of
20 x 20 x 520 mm is placed at the top. There are two notches so that it rests on the blocks with a height of 9 mm.
At the bottom comes a tube of 15 x 15 x 450 mm, see the drawing. Glue them well.
Place two 35 mm wide strips of Superwool on the blocks, and place two 9 mm high spacers just in front of the exhaust block.
520
450


Spacers
40
110
350
600
75
75
150